Export to Table
Use the
Export to Table tool to create a new Engine database table from an existing segment.
The
Export to Table tool has a number of uses. For example, you could use it to create a snapshot of your database at a point in time, or you could create subsets of your database for profiling purposes, or to separate out lapsed customers or non mailable customers from your active database.
Procedure
- Drag the tool to your Workspace below the segment that you want to export..
The
Export to Table configuration tool is displayed.
- Click into the
Target Database
field and use the generic selector to select the Database that the table will be created on.
- Enter a name for the Table.
- From the
Mode drop-down menu select whether you want to create a new table or append to an existing table.
| Note: |
It is very important to take care when deleting tables - you can delete tables that were created by users other than yourself.
|
- The Unique Row Number (URN) is an Engine field which uniquely identifies each row in a table by assigning an incremental value starting at 1. It shouldn't be confused with unique reference numbers like Customer Numbers or Order numbers. Check the box if you wish to include this number as a table column in your new table.
- In the
Selected Layout area, select from the following layout types to specify which columns will be included in your new table:
- Resolution Table: This will include all columns from the table that your segment is resolved to.
- Inline: This method can be used to quickly create layouts on the fly. It will launch the Layouts tool where you can drag in items from the Data Explorer.
- Document: This method will let you choose from any Layouts that have already been added to the current document.
- Linked Template:
This will allow you to select a layout from those that have already been saved as templates. Search for the layout by name, or click the browse button and navigate to the folder location.
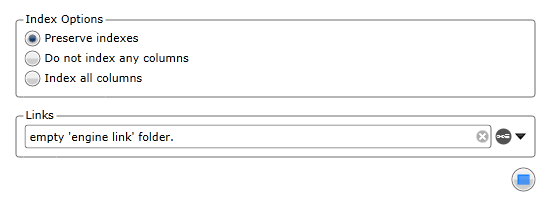
- Click the icon to flip the window over to Specify indexing and linking parameters:
- Index Options: Selects the required column indexing option.
- Links: Invokes the
Engine Link tool where you can link the new table to existing tables based on shared key columns.
- Click the
Run Processes button to create the Export.
What to do next
When complete, refresh the
Data Explorer to view your newly created table.
|


